Self-portraits are more than just selfies. They’re a creative way to express personality, practice photography skills, and even build a personal brand. Whether you want to create expressive portraits for social media, a professional profile picture, or experiment with lighting and composition, learning how to take great self-portraits is a valuable skill for any beginner.
In this complete guide, you’ll learn how to photograph yourself with intention — using a camera or smartphone — even if you don’t have someone behind the lens.
1. Why Take Self-Portraits?
Self-portraits are useful for many reasons:
- Practice composition, lighting, posing, and focus
- Build confidence in front of the camera
- Share your personality or story
- Produce content for social media, websites, or portfolios
- Express creativity and experiment without pressure
📌 They also give you complete control over every aspect of the photo.
2. What Equipment Do You Need?
You don’t need a full studio to take great self-portraits. Start with what you have and build from there.
Essentials:
- Camera with self-timer or remote (DSLR, mirrorless, or smartphone)
- Tripod or stable surface
- Good lighting (natural light or artificial)
- Remote trigger (Bluetooth, app, or wireless shutter release)
- Mirror (optional, to help pose or check framing)
📌 A smartphone with a high-quality front or rear camera and Pro mode is more than enough for most setups.
3. Plan Your Concept
Great self-portraits are intentional. Decide what you want the image to communicate before you press the shutter.
Ask yourself:
- What mood or emotion do I want to convey?
- Should it be minimalist, dramatic, playful, artistic?
- What story or theme will this photo tell?
Plan:
- Outfit
- Background
- Props (if any)
- Pose and expression
📌 Sketch or collect inspiration on Pinterest or Instagram before your shoot.
4. Set Up the Lighting
Lighting defines the mood of your self-portrait. Use natural or artificial light depending on the effect you want.
Natural light:
- Position yourself near a large window with soft, indirect light
- Use sheer curtains to diffuse harsh light
- Turn off indoor lights to avoid color mixing
Artificial light:
- Use a ring light, softbox, or LED panel
- Position lights 45 degrees to your face for soft shadows
- Use one light for simplicity, or add a backlight for depth
📌 Avoid direct overhead lighting — it creates harsh shadows under the eyes.
5. Choose the Right Background
Your background should support your portrait, not distract from it.
Tips:
- Use a plain wall, curtain, or simple furniture
- For studio-style portraits, hang a fabric or paper backdrop
- For lifestyle shots, use your room, a desk, or outdoor space
- Watch for clutter or strong patterns that pull attention away from you
📌 You can blur the background using wide aperture or Portrait Mode.
6. Set the Camera or Phone
Mount your device on a tripod, stack of books, or shelf. Then:
On cameras:
- Set manual focus or use face/eye detection autofocus
- Use a remote shutter or 2–10 second timer
- Frame the shot with space for cropping and posing
On smartphones:
- Use rear camera for higher quality
- Use a Bluetooth remote or built-in timer
- Frame using a mirror or your phone’s front-facing display (if available)
📌 On newer iPhones or Androids, use voice commands (e.g., “take a photo”) or gestures for hands-free shooting.
7. Focus and Exposure
One of the hardest parts of self-portraiture is getting sharp focus when you’re not behind the camera.
Focus tricks:
- Use autofocus and tap where your face will be
- Place an object (like a stool or light stand) where you’ll stand, focus on it, then replace yourself
- On manual focus lenses, use a piece of tape to mark the focus spot
Exposure:
- Shoot in manual or aperture priority mode
- Use a wide aperture (f/2.8–f/5.6) for background blur
- Keep ISO low (100–400) for cleaner results
📌 Shoot in RAW for better control in editing.
8. Posing and Expression
When you’re both the model and the photographer, posing can feel awkward — but practice makes perfect.
General posing tips:
- Relax your shoulders and face
- Angle your body slightly from the camera
- Shift weight to one foot for a natural stance
- Use your hands: touch your face, hair, or clothing
- Practice subtle expressions — even a micro-smile or gaze shift changes the mood
For seated portraits:
- Sit on the edge of the chair for better posture
- Cross one leg or lean forward slightly
- Use props (book, coffee cup, camera) to give your hands something to do
📌 Use a mirror to check your pose before pressing the shutter.
9. Take Multiple Shots
Don’t settle for one photo. The beauty of self-portraits is that you can shoot as many as you want.
Use:
- Burst mode or take a sequence of timed shots
- Vary expressions, poses, and angles
- Move slightly between each shot to find what works
📌 Expect to delete most photos — even pros only keep a small percentage from a shoot.
10. Edit With Purpose
Post-processing brings your self-portrait to life. Whether you prefer natural or artistic edits, keep your style consistent.
Basic edits:
- Crop and straighten
- Adjust exposure and contrast
- Fix skin tone and shadows
- Remove blemishes (but keep natural texture)
- Enhance eyes and details lightly
Apps for editing:
- Lightroom (mobile or desktop)
- Snapseed
- VSCO
- Photoshop for detailed retouching
📌 Avoid over-editing — let your personality shine through.
11. Share or Print Your Work
Don’t be afraid to share your self-portraits. They show confidence, creativity, and connection.
Platforms:
- Instagram (carousel your favorite variations)
- Personal website or blog
- LinkedIn for professional headshots
- Print for wall art, gifts, or portfolios
📌 Write a caption or story if your portrait has meaning — it adds depth to the image.
12. Experiment and Get Creative
Once you’re comfortable, push your creative boundaries.
Ideas:
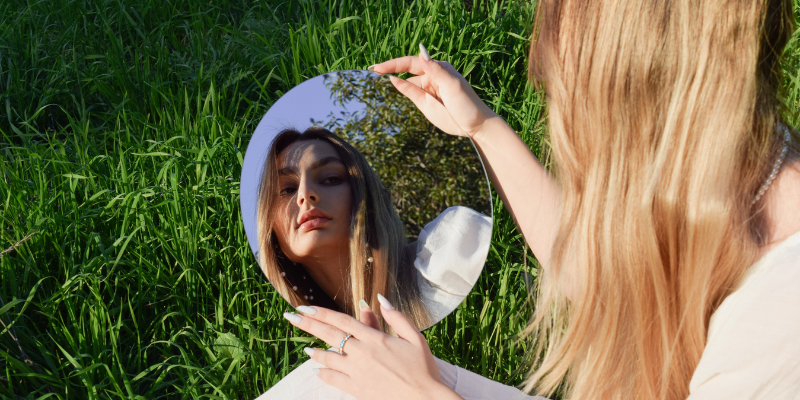
- Use mirrors, glass, or water for reflections
- Try black and white for drama
- Add movement with fabric, hair, or hands
- Shoot outdoors with dramatic landscapes
- Use shadow play (blinds, leaves, lace)
- Tell a story with costumes or props
📌 The more you experiment, the more confident you’ll become in both photography and self-expression.
Final Thoughts: Self-Portraits Are a Form of Self-Discovery
Photographing yourself isn’t vanity — it’s vulnerability, creativity, and personal growth.
Every time you step in front of the lens, you’re learning:
- How to light and compose
- How to pose and direct
- How to see yourself with kindness and curiosity
So take the time, hit the shutter, and make space for yourself in your own story — one photo at a time.